
Last updated 2020-07-21: to more recent nexus version
We assume you have an installation of minikube available. If not, then follow the installation instructions at Install Minikube
You'll be needing resources from this gitlab git repository: https://gitlab.com/edc4it/blog-resources/k8s-nexus
$ git clone https://gitlab.com/edc4it/blog-resources/k8s-nexus.git
Start minikube
Our nexus server won't be using TLS, so for that reason we need to tell the docker daemon of our minikube cluster to
allow insecure traffic. The hostname of our docker nexus-repository will eventually be nexus-docker.minikube. We will therefore
pass the --insecure-registry to the minikube command.
$ minikube start --cpus=4 --memory=8196 \
                 --insecure-registry=nexus-docker.minikube
Wait for the cluster to start.
After minikube has started, run the command below. You'll notice that the docker daemon is launched with the insecure-registry flag (see also dockerd documentation)
$ minikube ssh systemctl status docker
Please note that not using TLS is normally a very bad idea:
- We are using basic authentication, so the username/password is send unencrypted over the network
- It is very easy for someone to change pulled images by using a man-in-the-middle attack
Next, you will enable ingress inside your cluster. This will allows you to access HTTP routes from outside the cluster.
$ minikube addons enable ingress
Kubernetes objects
Eventually you'll add the following resources for the nexus server:
- a
PersistentVolumein order to store the nexus data - a
StatefulSetfor your nexus server (which will include a headlessService) - A second
Servicethat points to the pod directly (used by Ingress) - An
Ingressresource to access nexus and your docker repository
The PersistentVolume
Open the pv.yaml:
kind: PersistentVolume
apiVersion: v1
metadata:
  name: pv0001
  labels:
type: local
spec:
  capacity:
    storage: 5Gi
  accessModes:
  - ReadWriteOnce
  hostPath:
    path: "/data/pv0001"
This is a very straightforward definition of a PersistentVolume. It will offer 5Gi of storage for claims that seek ReadWriteOnce mode (meaning a single pod can
have read and write access)
Go ahead and add this to your cluster:
$ kubectl apply -f pv.yaml
The Nexus StatefulSet
For the other resources you'll be using a namespace nexus (the yaml files refer to this namespace). So before you continue, create this namespace:
$ kubectl create namespace nexus
Nexus is a stateful service. It is therefore best to deploy it as a Stateful set. This way you can easily create multiple nexus services inside your cluster. We will however create a single instance.
Open the nexus.yaml.
apiVersion: apps/v1
kind: StatefulSet
metadata:
  name: nexus
  namespace: nexus
  labels:
    app: nexus
    group: service
spec:
  replicas: 1
  serviceName: nexus
  selector:
    matchLabels:
      app: nexus
  template:
    metadata:
      labels:
        app: nexus
        group: service
    spec:
      securityContext:
        runAsUser: 200
        runAsGroup: 2000
        fsGroup: 2000
      containers:
        - name: nexus
image: 'sonatype/nexus3:3.25.0'
          ports:
            - containerPort: 8081
              protocol: TCP
            - containerPort: 8123
              protocol: TCP
          volumeMounts:
            - name: nexus-storage
              mountPath: /nexus-data
  volumeClaimTemplates:
    - metadata:
        name: nexus-storage
      spec:
        accessModes:
        - ReadWriteOnce
        resources:
          requests:
            storage: 2Gi
You should notice the following:
- We are using the sonatype/nexus3:3.25.0 image
- Notice the labels
app/group(we will use those further below) - We are just asking for a single server (
replicas: 1) - Our nexus server will expose two ports: the standard admin port 8081 and 8123 for the docker repository you'll be defining yourself further below in Nexus' Admin console.
- We define the
StatefulSet'svolumeClaimTemplatesand claim 2 Gi - We defined a security context for the pod (Nexus will run as user UID 200 and group 2000, see also the nexus docker documentation where it instructs these user/group settings sonatype/nexus3)
- The volume is mounted to
/nexus-datainside the container (which where our image saves all the data)
When you are done investigating the definition, apply it (This will take several minutes. Consider adding && ntfy -b pushover send "nexus" if you have a Pushover account and have ntfy installed)
$ kubectl apply -f nexus.yaml \
       &&  kubectl -n nexus wait pod nexus-0 --for condition=ready --timeout=5m
A StatefulSet is normally accompanied by a headless Service (a service without a clusterIP). This assists in creating the DNS hostnames for your pods.
Have a look at the definition at dns.yaml
apiVersion: v1
kind: Service
metadata:
  name: nexus
  namespace: nexus
  labels:
    app: nexus-web
    group: service
spec:
  ports:
    - name: http-main
      port: 8081
      protocol: TCP
      targetPort: 8081
    - name: http-docker-rep
      port: 8123
      protocol: TCP
      targetPort: 8123
  selector:
    app: nexus
    group: service
  clusterIP: None
As you can see this service matches the labels of our deployment (app/group). The service is headless so we set the clusterIP to None
Create the headless server
$ kubectl apply -f dns.yaml
The pod's service (nexus-0-service)
Eventually our reverse proxy inside the Ingress controller needs to point to our single nexus instance inside our StatefulSet. The name of this
pod will be nexus-0. So we will create a service that narrows down the selection and will only service to our pod.
Have a look at pod-service.yaml
apiVersion: v1
kind: Service
metadata:
  name: nexus-0-service
  namespace: nexus
spec:
  ports:
    - name: http-main
      port: 8081
      protocol: TCP
      targetPort: 8081
    - name: http-docker-rep
      port: 8123
      protocol: TCP
      targetPort: 8123
  selector:
    app: nexus
    group: service
    statefulset.kubernetes.io/pod-name: nexus-0
Notice how we narrow the pod selection to only the pod named nexus-0 using the generated label statefulset.kubernetes.io/pod-name
Let's create it:
$ kubectl apply -f pod-service.yaml
Then double check the endpoints of our Service. Use the following command to get the endpoints:
$ kubectl -n nexus describe service  nexus-0-service  | grep Endpoints
Endpoints:         172.17.0.7:8081
Endpoints:         172.17.0.7:8123
It should list the ip of the pod, which you can obtain using the following command
$ kubectl -n nexus  get pod nexus-0 -ojson | jq ".status.podIP"
"172.17.0.7"
Ingress resource
We will use Ingress to access our Nexus server from outside the cluster. (In fact we will also use ingress from within the cluster to keep the docker image names consistent between in and outside the cluster)
Open the nexus-ingress.yaml.
apiVersion: extensions/v1beta1
kind: Ingress
metadata:
  annotations:
    nginx.ingress.kubernetes.io/ssl-redirect: "false"
    nginx.ingress.kubernetes.io/proxy-body-size: "0"
  name: nexus
  namespace: nexus
spec:
  rules:
    - host: nexus.minikube
      http:
        paths:
          - backend:
              serviceName: nexus-0-service
              servicePort: 8081
            path: /
    - host: nexus-docker.minikube
      http:
        paths:
          - backend:
              serviceName: nexus-0-service
              servicePort: 8123
            path: /
  tls:
    - hosts:
        - nexus-docker.minikube
A few important pointers about this definition:
- Notice how we set our
nexus-0-serviceas thebackend(the service you just created, directly to our pod) - We are mapping its port 8123 to the hostname
nexus-docker.minikube(we still need to define this port when adding the repository to nexus) - The admin interface of Nexus will be available via
nexus.minikube - We are configuring the
Ingressresource using annotations:- no redirecting of http to https using the annotation: nginx.ingress.kubernetes.io/force-ssl-redirect
- Disable the max POST body size (which is 1m, and this is too small for docker layer uploads) nginx.ingress.kubernetes.io/proxy-body-size
- We are defining
spec.tls.hoststonexus-docker.minikube. If we don't specify that then a POST will redirect to the default host and will not be handled by ournexus-docker.minikubebackend (Have a look at #1623)
Apply the yaml to create the ingress routes
$ kubectl apply -f nexus-ingress.yaml
Before we can test you'll need to add the hosts names to your hosts file:
-
If you are running Linux use:
$ echo $(minikube ip) \ nexus.minikube nexus-docker.minikube | sudo tee --append /etc/hosts -
For Windows, open a Powershell as Administrator and run the following command:
PS C:\WINDOWS> Add-Content 'C:\Windows\System32\drivers\etc\hosts' `
   "$(minikube ip) nexus.local nexus-docker.local"
After this open the following url in your browser: http://nexus.minikube/
Everything is looking great so far!
Nexus configuration
Nexus generated an admin password when it started for the first time. You can get the password from the /nexus-data/admin.password inside your container.
$ kubectl -n lab-nexus exec nexus-0 -- cat /nexus-data/admin.password
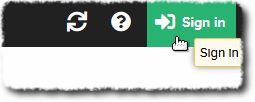
Open the nexus console at http://nexus.local/ and login using admin as the username, and the password you found in the file above:
Then the wizard will ask you some questions:
- To reset your password, consider using "masterkey" as that is what we''ll be referring to in this article.
- Allow anonymous access
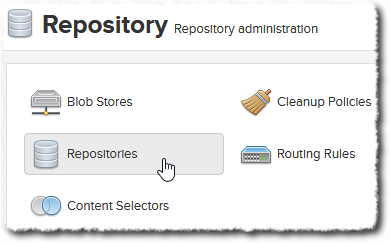
After you've completed the wizard, you'll get to create your docker repository. Find your way to Server administration and configuration (shown as a cogwheel)

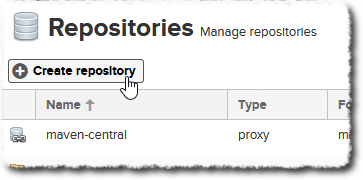
Then click the Create Repository button in the top of the list of available repositories.
Click on Create Repository
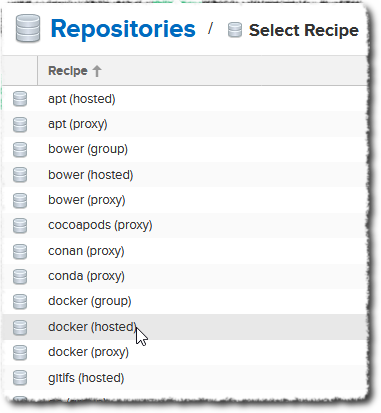
You are presented with a list of available repository types (in the form of recipes). In this list find docker (hosted) (make sure not to choose group or proxy)
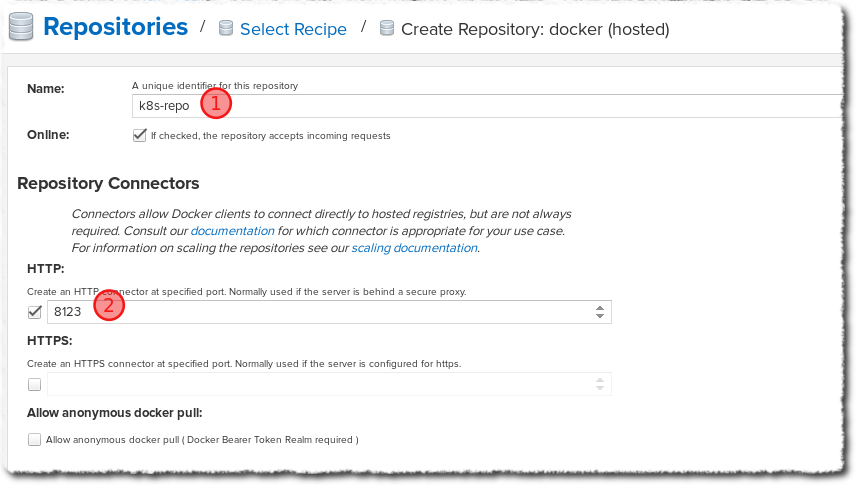
This opens a page where you have to specify the configuration of your repository.
Set the following values (see also the screenshot further below)
- Name it anything you like, for example k8s-repo
- Set the HTTP port to 8123 (this is what we have been using in the configuration so far)
- Click on create repository at the bottom of the page
After creating the repository it should be available in the list.
Check the ingress routing to your repository:
$ curl -I -u admin:masterkey  http://nexus-docker.local/v2/
HTTP/1.1 200 OK
Server: nginx/1.17.10
…
Awesome that also works!
Client configuration
We also need to tell the docker daemon on your host that it is ok to use an insecure registry for our repository.
The configuration of your docker daemon is available is a json file:
- On linux: /etc/docker/daemon.json`. Edit this
- For windows:
C:\ProgramData\Docker\config\daemon.json
Edit this file as root/administrator
The file is most likely empty. You will need to add the following (if the file was not empty, then don't add the curly-braces)
{
  "insecure-registries" : ["nexus-docker.minikube" ]
---
You will need to restart your docker daemon:
-
For linux, use:
$ sudo systemctl restart docker -
For windows:
PS C:\WINDOWS> restart-service *docker*
When you want to work with a private docker repository you need to authenticate yourself. This can be done using various techniques (tokens, certificates, …). We will however use basic authentication.
Use the docker CLI to login:
$ docker login -u admin -p admin123 nexus-docker.minikube
This will write your credentials (unencrypted) to ~/.docker/config.json
Check it out for yourself:
$ cat ~/.docker/config.json

{
  "nexus-docker.local": {
    "auth": "YWRtaW46bWFzdGVya2V5"
  }
---
The username/password are base64 encoded:
$ cat ~/.docker/config.json | jq -r '.auths["nexus-docker.local"].auth' | base64 -d
admin:masterkey
Push an image
Let's use an available image: edc4it/hello-node
First pull the image to make sure you have it on your docker host:
$ docker pull edc4it/hello-node
In order to push an image the repository part of the image name needs to be set to the host[:port]. Add an additional tag
nexus-docker.minikube/hello-node to our image:
$ docker image tag edc4it/hello-node nexus-docker.minikube/hello-node
You are now ready to push your image
$ docker push nexus-docker.minikube/hello-node
Let's see if it is available. In the nexus admin, go to Search | Docker
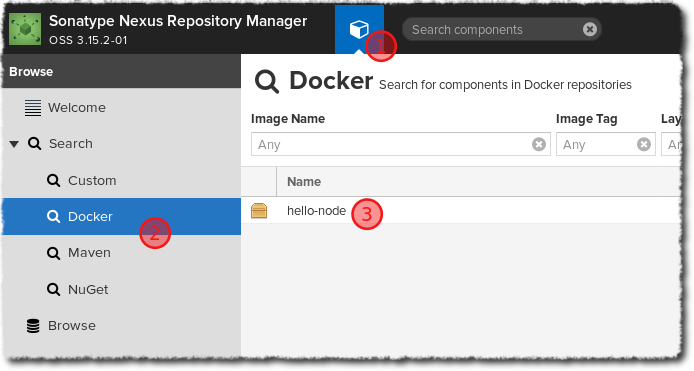
Grand! With the image available, we can start using it inside a pod.
Use the image inside k8s
As a final step let's enable access to our repository from within your cluster. You will deploy an application inside a new
namespace named hello:
$ kubectl create namespace hello
You will need to provide the docker login credentials to your namespace so that pods can successfully pull from it.
These secrets can be created using the create secret command and passing the details as arguments --docker-server, --docker-username etc. However
we can also import secrets based on existing docker credentials available inside your ~/.docker/config.json file:
$ kubectl -n hello create secret generic nexus-docker-credentials \
       --from-file=.dockerconfigjson=$HOME/.docker/config.json  \
       --type=kubernetes.io/dockerconfigjson
Notice the name of this secret: nexus-docker-credentials. We will use that inside our yaml to supply k8s with the necessary credentials. Open the hello-app.yaml
and have a look at the Deployment and in particular the pod template's configuration:
apiVersion: apps/v1
kind: Deployment
metadata:
  labels:
    app: hello-node
  name: hello-node
  namespace: hello
spec:
  replicas: 1
  selector:
    matchLabels:
      app: hello-node
  template:
    metadata:
      labels:
        app: hello-node
    spec:
      containers:
      - image: nexus-docker.minikube/hello-node
        imagePullPolicy: Always
        name: hello-node
      imagePullSecrets:
      - name: nexus-docker-credentials
We are supplying the imagePullSecrets on the pod template so that it has the credentials available to pull from our private registry.
While you are here notice the Service and the Ingress configuration. Our application will eventually be available at the path /hello
Deploy the application/service and ingress route for the hello-node
$ kubectl apply -f hello-app.yaml
Notice the docker image is pulled (you should see Successfully pulled image nexus-docker.minikube/hello-node" in the events below)
$ kubectl -n hello describe pod
After the pod is ready, test the application:
$ curl  http://$(minikube ip)/hello
hello friend
That works! So your image was successful pulled and used as the container inside your pod.