
I don't want to go into an introduction of webpack, there are some excellent articles who do just that examples: here and here. If you come from a Java background, then webpack to gulp/grunt/browserify is similar to what maven was to ant.
We will create a very simple web application and gradually add more webpack functionality as we go along.
You can find the resulting project on github webpack-intro-tutorial
Installation
I will assume you have already node installed as well as npm
Let's create a new project directory and initialise it with a package.json
$ mkdir demo && cd demo
$ npm init -y
FYI The -y option above stops npm prompting for questions and answers "yes" to them all instead.
Then install webpack (locally):
$ npm install webpack@5.x webpack-cli@4.x --save-dev
Hello Friend
Let's do a quick "hello friend": create a javascript file named ./src/index.js together with a html files
named ./index.html (latter in the root of our demo project directory.
Contents of the index.html
<!DOCTYPE html>
<html lang="en">
<head>
    <meta charset="UTF-8">
    <title>Webpack Hello World</title>
</head>
<body>
   <script  src="dist/main.js" ></script>
</body>
</html>
It will become clearer later on why we are loading a javascript file named main.js and not index.js ;)
As to the javascript code (inside src/index.js) we simply write some text to the html document:
document.write("hello friend");
Your structure should resemble
├── node_modules
├── src
│   └── index.js
├── index.html
├── package.json
└── package-lock.json
Let's now run webpack:
$ npx webpack
asset main.js 31 bytes [compared for emit] [minimized] (name: main)
./src/index.js 32 bytes [built] [code generated]

WARNING in configuration
The 'mode' option has not been set, webpack will fallback to 'production' for this value.
Set 'mode' option to 'development' or 'production' to enable defaults for each environment.
You can also set it to 'none' to disable any default behavior. Learn more: https://webpack.js.org/configuration/mode/

webpack 5.58.1 compiled with 1 warning in 130 ms
Note it has created an asset named main, which can be found in dist/main.js, which we referred to inside our
html file.
Now simply open your index.html file in a browser and you should see "hello friend" on the
page.
A second javascript file
Let's add a second javascript and use that from the one you created above. Create a new file named ./src/contents.js . We will just have it export a string with the text to be printed (might be a
bit silly, but it serves the purpose of this tutorial)
export default 'hello friend!';
Notice we have added an exclamation mark. This will make it easier to see the update once we test this version.
Change the src/index.js to use the exported string from above:
import msg from './contents.js'

document.write(msg);
And let's run webpack again:
$ npx webpack
asset main.js 55 bytes [emitted] [minimized] (name: main)
orphan modules 32 bytes [orphan] 1 module
./src/index.js + 1 modules 86 bytes [built] [code generated]

…
Notice it now created the main chunk based on two javascript files (it displays "+ 1 module"). Refresh your browser and you should see the updated message (remember we added an exclamation mark for this purpose)
Using a configuration file
We have not configured webpack, this is possible since webpack 4. However for most projects you'll need webpack configuration.
Let's now create the webpack configuration file. By default webpack looks for files named
webpack.config.js or webpackfile.js. We will use the former: add a file named ./webpack.config.js to the root of
our demo directory with the following contents:
const path = require('path');

module.exports = {
    entry: "./src/index.js", // bundle's entry point
    output: {
        path: path.resolve(__dirname, 'dist'), // output directory
        filename: "[name].js" // name of the generated bundle
    }
};
Some details explained:
- the
entryspecifies the entry point for the bundle(s) (in this case we only have one entry point, hence we will only be creating a single bundle) - The
output.pathtells webpack where to save the generated files - The
output.filenamespecifies the name of each output (where[name]refers to the name of the "chunk". We could have used a hard coded value such as"main.js", but this prepares it better for the future)
Let's rerun webpack:
$ npx webpack
It now used your configuration (you could have also passed the configuration using --config webpack.config.js, but we have used a name which is loaded by default, so no need.
So far our configuration is not adding any functional we did not already have without a configuration file. Notice we are getting a warning each time indicating The 'mode' option has not been set? We can set it to production mode explicitly, by adding the mode option to the configuration:
const path = require('path');

module.exports = {
    mode: 'production',
    entry: "./src/index.js", // bundle's entry point
    output: {
        path: path.resolve(__dirname, 'dist'), // output directory
        filename: "[name].js" // name of the generated bundle
    }
};
Run webpack again and notice the warning is gone. You now feel more confident it is indeed using your configuration file. Let's configure the webpack project further, by configuring a plugin.
If you want to run in development mode, you can pass it as an argument:
$ npx webpack --mode=development

asset main.js 4.17 KiB [compared for emit] (name: main)
runtime modules 670 bytes 3 modules
cacheable modules 86 bytes
  ./src/index.js 54 bytes [built] [code generated]
  ./src/contents.js 32 bytes [built] [code generated]
webpack 5.58.1 compiled successfully in 61 ms
Use the HtmlWebpackPlugin
We can have webpack inject links into our html for our generated chunks file by using the HtmlWebpackPlugin plugin.
As with everything, first install the HtmlWebpackPlugin using npm:
$ npm install html-webpack-plugin@5.x --save-dev
And then update our webpack.config.js to add support for the HtmlWebpackPlugin plugin
-
In the top of the file add an import:
const HtmlWebpackPlugin = require('html-webpack-plugin'); -
Under the
modulesection, add apluginssection:plugins : [ new HtmlWebpackPlugin({ template: "index.html", inject : "body" }) ]
We are telling webpack to use the plugin and we have configured it to inject
the assets at the bottom of the body element using index.html as the template. By default
the outcome can be found inside a file also named index.html (can be changed using filename option) inside dist directory (which is our configured
output.path)
The plugin will now inject our javascript chunk, therefore make sure you remove the script tag from our index.html:
<!DOCTYPE html>
<html lang="en">
<head>
    <meta charset="UTF-8">
    <title>Webpack Hello World</title>
</head>
<body>
</body>
</html>
Then run webpack again (there might be a warning which will be fixed in the a newer version of the html-webpack-plugin)
$ npx webpack
…
asset main.js 4.17 KiB [compared for emit] (name: main)
asset index.html 174 bytes [emitted]

…
It has now also generated the dist/index.html based on our template with
an injected script reference. Now open this! file into your browser (so the one from the dist directory, not the
one from the root of your project)
It is a good idea to move the index.html also to the src folder:
$ mv index.html src
And then change the webpack configuration accordingly:
new HtmlWebpackPlugin({
    template: "./src/index.html",
    inject : "body",
    scriptLoading: "blocking",
})
We are setting scriptLoading to "blocking". This causes the generator script tag to omit the defer attribute. We need this because we are writing to the document using document.write.
Using the dev server
You could have webpack "watch" your files and generate files as needed. You would
just run webpack with the --watch flag:
$ npx webpack --watch --mode=development
...
Now every time you make a change to one of your files webpack will process them. But there is even a
neater trick: using its development web server webpack-dev-server.
Let's install it locally:
$ npm install webpack-dev-server@^4 --save-dev
To run the webpack dev-server, use the serve command on the webpack CLI;
$ npx webpack serve --mode=development
「wds」: Project is running at http://localhost:8080/
ℹ 「wds」: webpack output is served from /
ℹ 「wds」: Content not from webpack is served from /home/cameronhowe/demo
…
Now open your browser at http://localhost:8080/
Any change you make to the code is live reloaded in your browser, try it out!
note it does not update the files in the dist folder. All assets are in
memory!
Adding other assets (css)
Add a css file named ./src/message.css:
#message {
    background-color: #0086b3;
    font-weight: bold;
}
Change the src/index.js and add an div#message element:
// src/index.js
import msg from './contents.js';
import './message.css';

var div = document.createElement('div');
div.id='message';
var txtNode = document.createTextNode(msg);
div.appendChild(txtNode);
document.body.appendChild(div);
The code above requires a css to be present on the page. We can accomplish this by
adding a import instruction to the top of the file:
// src/index.js
import "./message.css";
...
If you are still running the dev server, you'll notice an error:
ERROR in ./src/message.css 1:0
Module parse failed: Unexpected character '#' (1:0)
You may need an appropriate loader to handle this file type.
The next section explain this. You better stop your 'webpack serve' first
Explanation of webpack modules
Look at this import "./message.css" again. What we are doing is really defining a module dependency,
but not to a javascript file but to a css file. This is something node.js for example is not capable of. This is in fact the
whole «raison d'etre» for webpack. It can treat any file in your project as a module. Plus you can use many techniques to
express a dependency. We are using import (EMS), but this also works for es6 require (CommonJS) and even @import inside your sass files.
But by default webpack only knows how to deal with javascript modules. We therefore need to configure support for our module type (which is css).
Inside our configuration we can define how a module should be treated. This typically consists of
- a condition (when does our module definition apply) often in the form of a
testwith a regular expression to match resource names - applying a set of loaders which describe to webpack how to process non-JavaScript modules
The above view is a simplified one, as much more is possible (nested rules, parser options and more)
So we need to add a configuration for modules that match the regular expression /\.css$/ and what loaders to use in order for
webpack to be able to process css modules.
We will need two loaders: the style-loader and the css-loader. (their roles are explained further below) Install both of these using npm:
$ npm install css-loader@^6 style-loader@^3 --save-dev
And let's now configure our module. Add a module section to our webpack.config.js and add rules as shown
below:
entry : ...,
output : {...},
module: {
    rules: [
        {
            test: /\.css$/,
            use: ["style-loader","css-loader"]
        }
    ]
},
plugins : [...]
If you have not done so already rerun:
$ npx webpack serve --mode=development
And notice the style is applied.
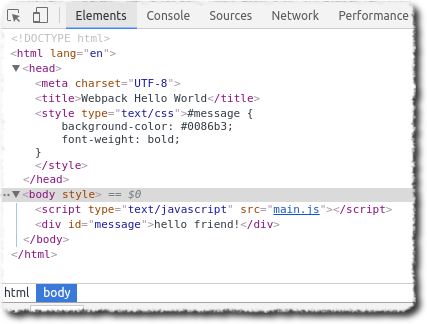
So what is going on here? We are instructing webpack to process all
files matching our test (/\.css$/) using a pipeline of loaders: first the css-loader and after that
the style-loader are applied. The css-loader loads css files and returns css code, the style-loader
then adds this as a style element to the DOM. Notice the DOM tree from the resulting page:
Let's use a library
Let's use a library and for the purpose of this article let's use the familiar jquery (cough...."what year is this?") .
First let's add the node packages:
$ npm install jquery@3 --save-dev
Then change the code in our index.js to use jquery (like it's 2003):
import $ from 'jquery';
import msg from './contents.js';
import './message.css';

$(() => {
    $("<div id='message'>")
        .text(`${msg}!`)
        .appendTo('body');
});
When you run again, you should see two exclamation marks. Wow that was easy. We did not have to change our html file or worry about loading jquery.
Using other languages (typescript)
With webpack it is fairy straightforward using various javascript compiles such as babel and typescript This is accomplished using loaders just as we did with css earlier on.
Let's use typescript as an example (if you are interested we have a blog article explaining how to setup a simple typescript project)
Install typescript, typings for node/core-js and jquery
$ npm  install \
     typescript@4 \
     @types/jquery@3  --save-dev
Create a ./tsconfig.json to configure the typescript compiler:
{
  "compilerOptions": {
    "outDir": "./dist/",
    "module": "es6",
    "target": "es5",
    "moduleResolution": "node",
    "allowSyntheticDefaultImports": true
  }
}
We completed configuring a typescript project, Next let's turn back to webpack. We start by installing a webpack typescript loader. We'll use ts-loader.
$ npm install --save-dev ts-loader@9
Configure webpack to use our typescript loader (ts-loader) by adding a module.rules to our webpack.config.js:
module: {
    rules: [
        {
            test: /\.ts$/,
            loader: "ts-loader",
            exclude: /node_modules/,
        },
        {
           …
        }
    ]
},
We're using loader and not use in the rule-configure above. This is because use accepts an array of loaders that are piped together, whereas loader is used when we have a single loader. It is in fact an alias for use: ["ts-loader"]
We can now migrate our code from javascript to typescript. Let's only migrate index.js and contents.js, we will leave vendor.js alone. Rename your
files:
index.jstoindex.tscontents.jstocontents.ts
Use the refactoring functionality of your IDE so that references are also updated. If you are using a text editor, you may use the command below to rename your files.
$ mv src/index.js src/index.ts && mv src/contents.js src/contents.ts
Don't forget to update the entry references to index.ts inside the webpack.config.js (if not already done so by your IDE):
entry: {
    main: "./src/index.ts",
    …
},
As a final step migrate your javascript code to typescript.
The migrated contents.ts (notice we are changing the text as well so that it will be easier to observe when webpack uses this source):
const m: string = 'hello friend!';
export default m;
And rewrite index.ts as well:
import $ from 'jquery';
import msg from './contents';
import './message.css';

$(() => {
    $("<div id='message'>")
        .text(`${msg}!`)
        .appendTo('body');
});
Notice we have removed the suffix from the import of contents (before we had contents.js).
We can have webpack resolve extension-less references:
   entry : ...,
   resolve: {
      extensions: ['.js', '.ts']
   },
   output : {...},
   module: {...},
   plugins : [...]
You are ready to check your project again. Run webpack or the dev-server and observe everything is still working, but now written in typescript.
Use scss
Let's add support for yet another module type: sass css.
In order to use scss we need to install node-sass and a webpack loader:
$ npm install node-sass@6 sass-loader@12 --save-dev
Register the loader under our set of rules:
  {
     test: /\.scss$/,
     use: ['style-loader', 'css-loader', 'sass-loader'],
  },
Rename your message.css to message.scss:
$ mv src/message.css src/message.scss
Don't forget to update the reference to this renamed file inside our index.ts:
import './message.scss';
And let's throw in some sassiness into the message.scss
$color: #0086b3;

#message {
  background-color: $color;
  font-weight: bold;
  border: solid darken($color, 10%);
  padding: 0.5rem;
}
Test it and see your page looks much hipper now!
Sourcemaps for SCSS
As a final step let's add source maps for sass. Both loaders have a sourceMap option. For both
loaders, the default value depends on Webpack's devtool configuration option. This devtool option
determines how sourcemaps are generated. In development mode, the default is eval. With this each module is using JavaScript's eval() function.
This is great for JavaScript (as it is blazing fast), but not so much for css. In fact, our loaders' sourceMap option is set to false when devtool
has a value of eval or none (which is default in production mode).
We therefore have two options:
- Change the
devtoolto a different value (e.g,eval-source-map) - or, set the
sourceMapexplicitly on our loaders
Let's choose the latter. This way we keep the benefit of fast sourcemap generation for JavaScript-related modules:
{
    test: /\.scss$/,
        use: [
            "style-loader",
            {
                loader: "css-loader",
                options: {
                    sourceMap: true,
                },
            },
            {
                loader: "sass-loader",
                options: {
                    sourceMap: true,
                },
            },
        ],

As you can see the the sourcemaps are working.
This completes this first tutorial. Remember the project is available on github at webpack-intro-tutorial
If you are interesting in Angular, then next is the helloworld-angular2 article.